
By the end of this guide you will have a monitor that opens one public page on a schedule you choose, compares it with the previous version, and emails you a readable diff of what was added and removed — but only when the part of the page you actually care about changes.
That last clause is the whole job. Setup takes about three minutes; making a monitor you still trust a month later comes down to which area of the page you select and which elements you exclude.
Step 1: Decide exactly what you want to monitor
First, write the fact you want to be told about in one sentence: "the price of this configuration changed", "a new role was posted for this team", "they added an enterprise tier". That sentence decides everything else.
Then decide whether you are monitoring a whole page or one area of it. Whole-page monitoring suits small, stable documents: a terms of service page, a single announcement, a status note. On anything commercial it will drown you. A typical product page carries a rotating promo banner, a review count, a "customers also bought" carousel, a stock indicator, and a chat widget — each changing on its own timetable, each producing an alert you did not want. Two weeks of that and you stop opening the emails.
A selected area inverts that: select only the price block and every alert means the price moved. The narrower the selection, the more each alert is worth.
Step 2: Add the page
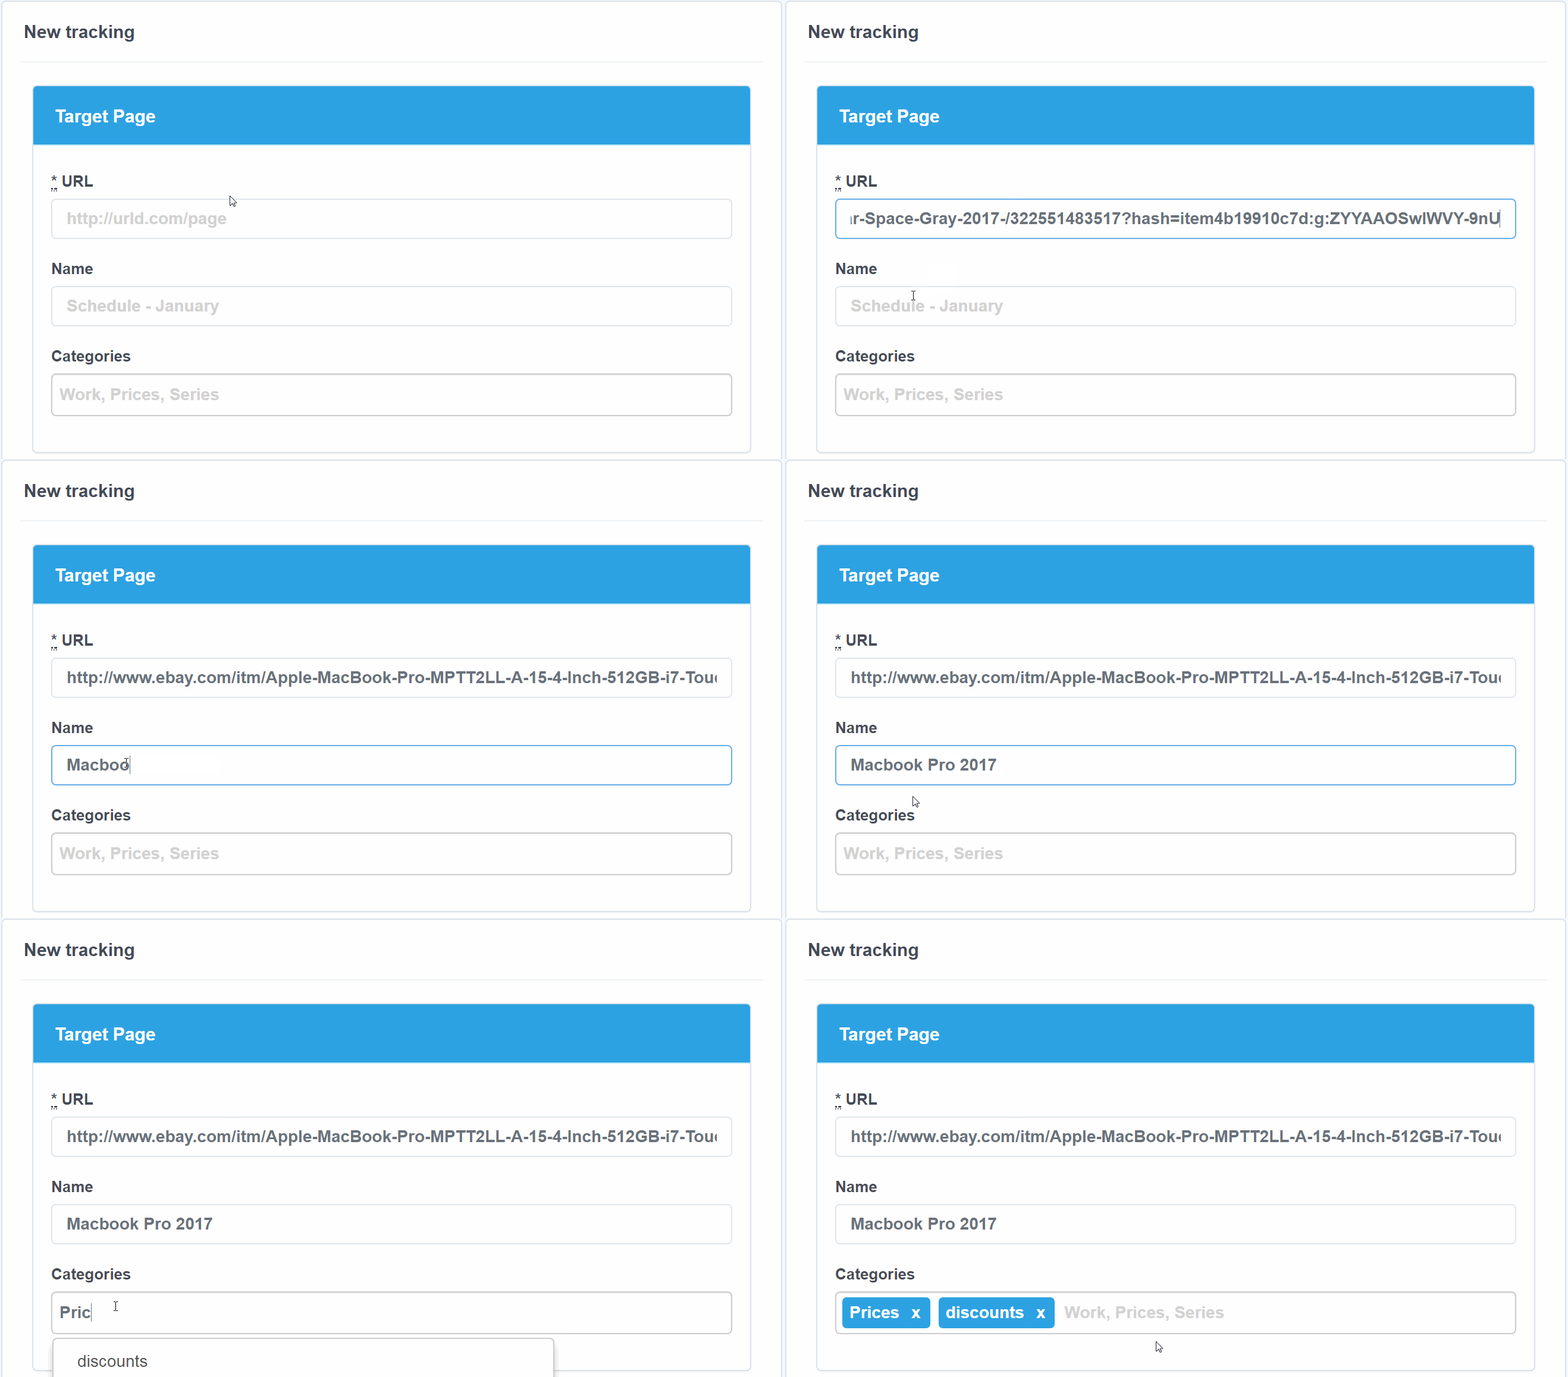
Three fields, and only the first is required.
URL
Paste the exact page that displays the fact you named in step 1 — the specific product page, the filtered search results URL, the individual listing, not the site's home page. Whatever a logged-out visitor sees at that URL is what the monitor will compare.
Name
Something you would recognize in an email subject line six weeks from now: "Competitor pricing — enterprise tier" rather than "pricing page 2".
Categories
Optional tags that group monitors — Prices, Hiring, Suppliers, Compliance. They pay off once you are running a dozen and want to see one group at a time.
Step 3: Select the page area and filter out the noise
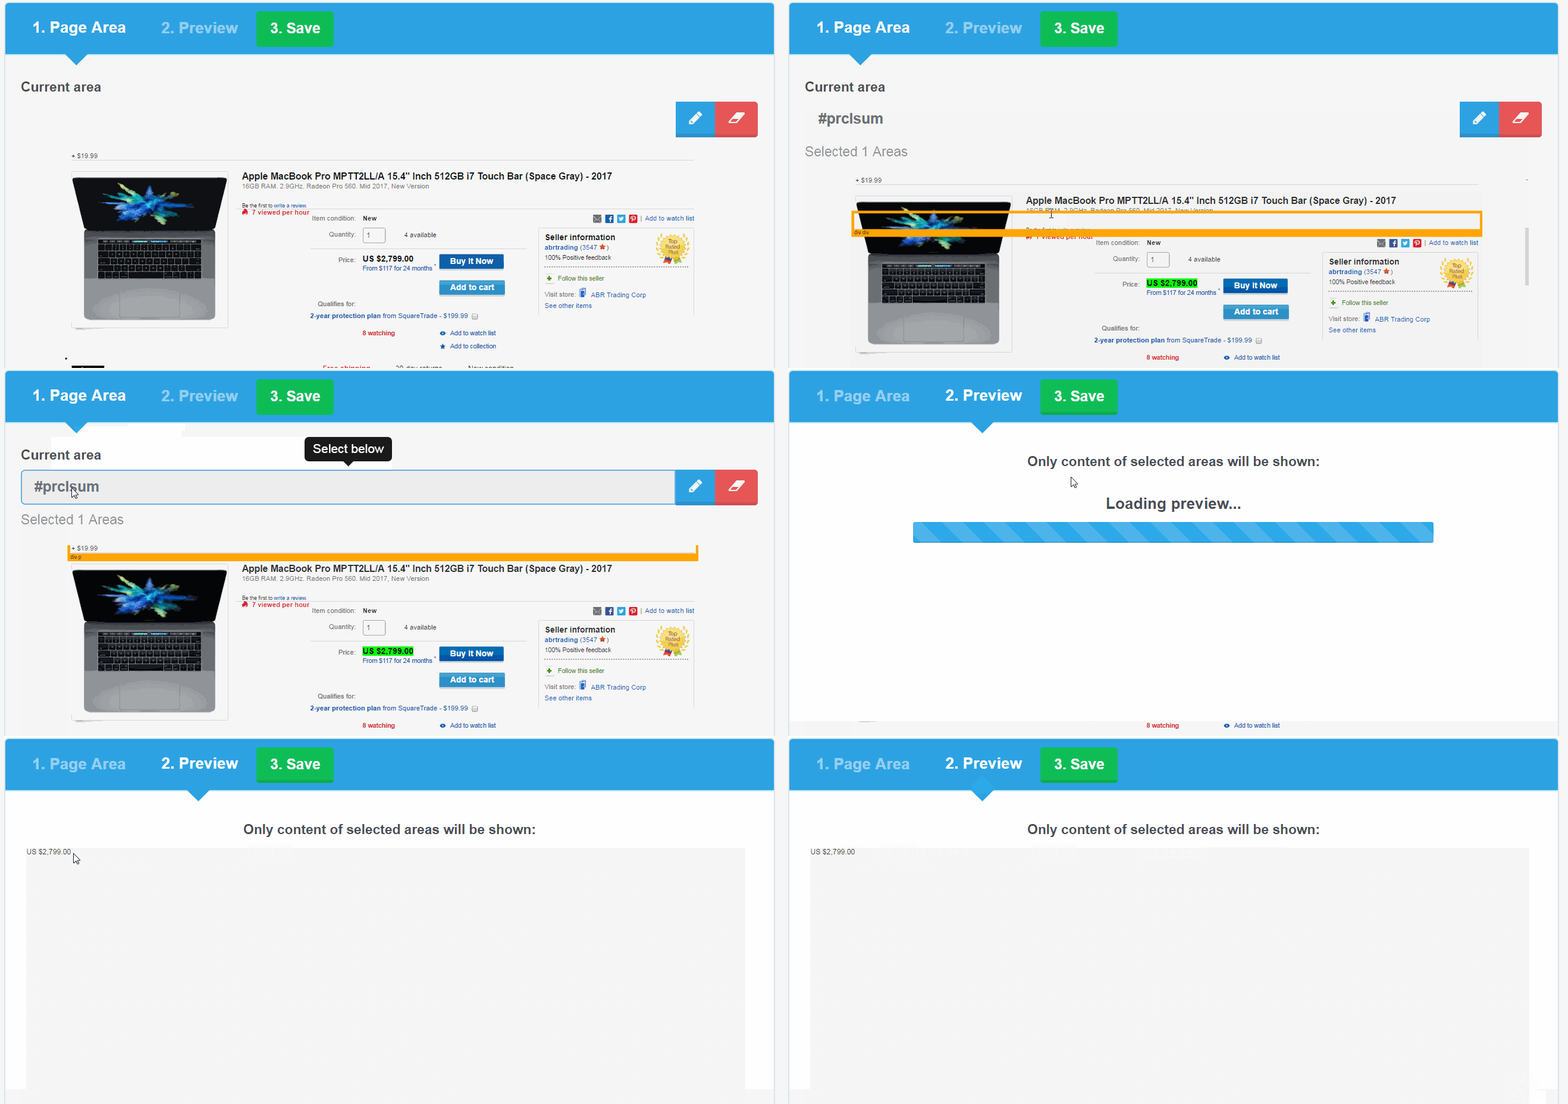
This is the step that separates a monitor you keep from one you mute, so it is worth two extra minutes. The Page Area tab loads the page inside the editor. Click the block containing the content you want; selected elements are highlighted in green and orange, and a counter shows how many areas you have selected. You can select several — a price and a stock line, for example.
Then subtract. Click an element inside your selection again to exclude it, and it turns red. Worth excluding almost every time:
- Rotating promo strips and banner carousels, which rewrite themselves on every load.
- Anything printing today's date, a "last updated" line, or a countdown timer.
- View counters, review counts, and "12 people are looking at this right now" nudges.
- Recommendation rails — "customers also bought", "related listings", "you may also like".
- Cookie banners, chat widgets, and ad slots sitting inside the block you selected.
Two options handle the noise that is awkward to click away:
- Exclude dates — ignores changes that consist only of dates and timestamps, which removes the single most common false alert on pages that print the current date.
- Elements filter — chooses which direction of change counts. Include all shows everything; Exclude removed reports only content that appeared (a new listing, a new row, a new job); Exclude added reports only content that disappeared, such as an item leaving a catalog or a role being pulled.
If you know CSS, you can unlock the selector field and type one directly; the reset button clears everything and starts you over.
Step 4: Set the schedule and, if the page is busy, a keyword filter
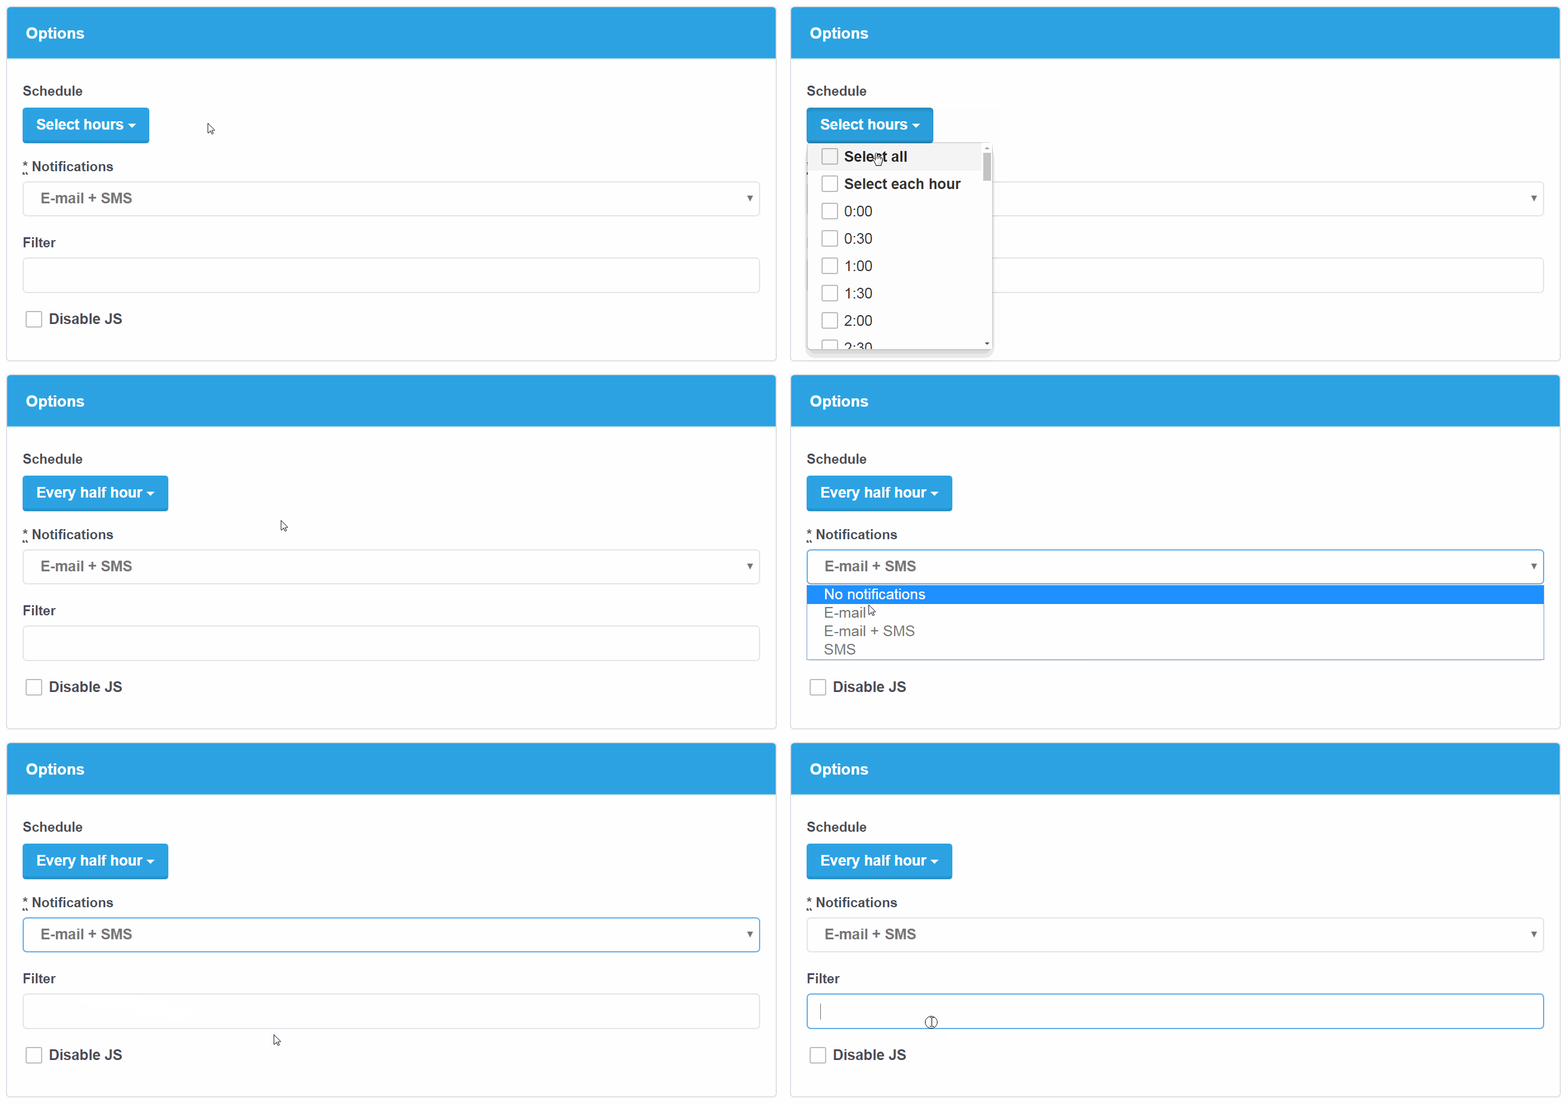
You pick the times of day a page is checked rather than an abstract frequency, so checks land when you can act on them. A single daily check is enough for most monitoring: terms and policy pages, supplier documentation, a competitor's pricing page, a changelog, a regulator's notice board. These change deliberately and stay changed, so finding out at 9am is no worse than at 3am. Move to hourly or every 30 minutes, on plans that include half-hour checks, when the window to act is short: restocks, limited drops, ticket releases, fare changes. The free plan checks once a day.
On a page that changes constantly for reasons you do not care about, add a keyword filter. It applies to the changed content rather than the page as a whole: the alert fires only when the text that changed inside your selected area contains your phrase. Watching a large jobs board with "Product Manager" as the filter means listings for other roles pass silently. Keyword monitoring works through the common setups.
Step 5: Choose how the alert reaches you
You can use any combination of these on a single monitor.
- Email — on by default. The message contains the diff itself, so you can usually decide whether to act without opening the page.
- Zapier — hand each change to Slack, Google Sheets, Trello, or anything else in your Zapier account. The usual route for posting to a team channel or appending a row so you keep a history.
- IFTTT — add your IFTTT webhook key and an event name, then send each change individually or as a summary per check.
- Webhook — post the change straight to your own endpoint, available with API access enabled.
Step 6: Preview, then save
The Preview tab shows only the content of your selected areas — exactly what will be compared from one check to the next. Read it as a forecast of your inbox: anything in the preview that changes on its own will eventually alert you, so if something there looks volatile, go back to Page Area and exclude it.
If the preview comes back blank, truncated, or looking nothing like the page in your browser, change the JavaScript rendering setting. Urlooker renders with headless Chrome by default, which is what most modern sites need; a minority serve a simpler, more stable version to a plain request, and for those the Disable JS option gives a cleaner result. Try both and keep whichever preview matches the page.
Then save. Saving stores a baseline immediately, so the next scheduled check is the first that can alert you, and checks after that are kept as a dated history of the page for 12 months.
You need an account to save a monitor. The free plan covers two pages checked once a day and stays free indefinitely. Create a free account or sign in if you have one already.
Where to go next
- Step-by-step guides for specific sites — recipes for Amazon, LinkedIn, Greenhouse, SEC EDGAR and dozens more, each naming the page to watch, the area to select, and the schedule that suits it.
- Price drop alerts — the tactics above applied to product pages, where the noise is heaviest.
- Website change monitor overview — what the tool does across the whole workflow.